Wooden disks: 4 creative ideas to turn them into decorative objects
Wooden disks (or slices) are a cheap DIY resource that are readily available at most hobby and crafts shops.
At first glance, it might seem that you can't do much with these disks. However, they are easily transformed into wonderful decorations, ornaments and furnishing accessories of all kinds.
We show you, below, some of these ideas that you can copy using wooden disks:
1. Coasters
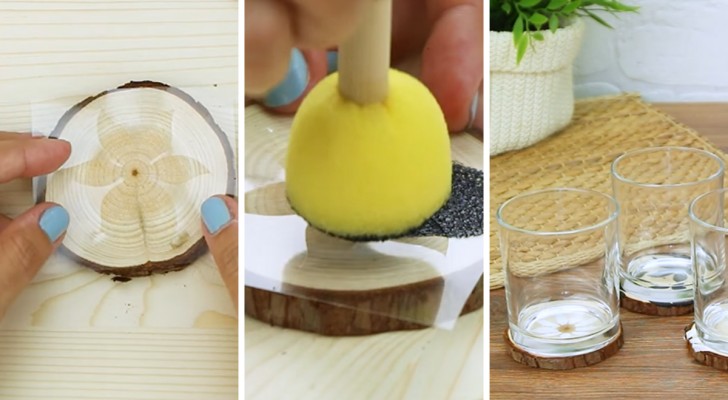
To make these fabulous coasters you just need (in addition to the wooden disks) stencils, acrylic paints, a sponge and PVA glue. Decorate each disk however you like, using the stencils and acrylic paints. Let them dry and then pass a layer of PVA glue over the surface of the disk which, once dry, will turn into a glossy and will waterproof the coasters.
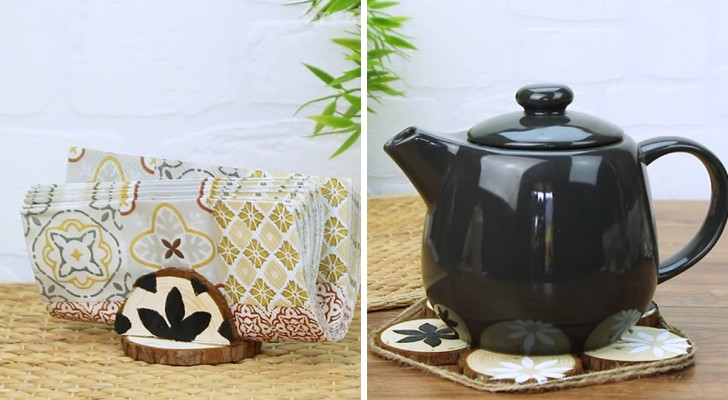
2. Trivet
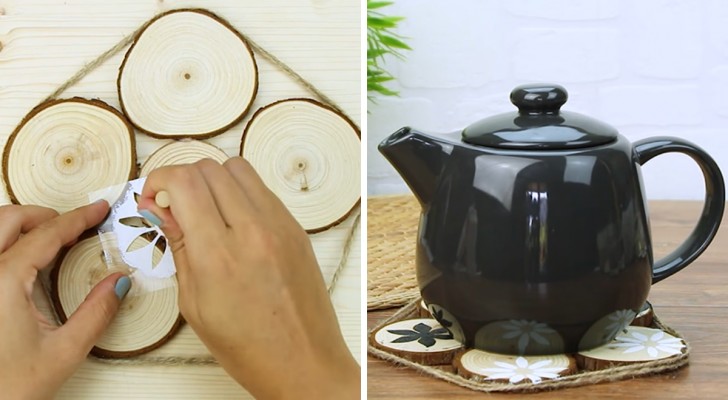
If you want to make a pretty trivet (teapot stand), take a few disks and join them together in the shape of a flower. To attach them to each other, use hot glue, applying it to the touching edges. Then, tie cord or twine around the outer perimeter. Decorate the surface of the trivet as described above for the coasters. Finally, apply a layer of PVA glue and, after letting it dry, your trivet will be ready for use.
3. Napkin holder
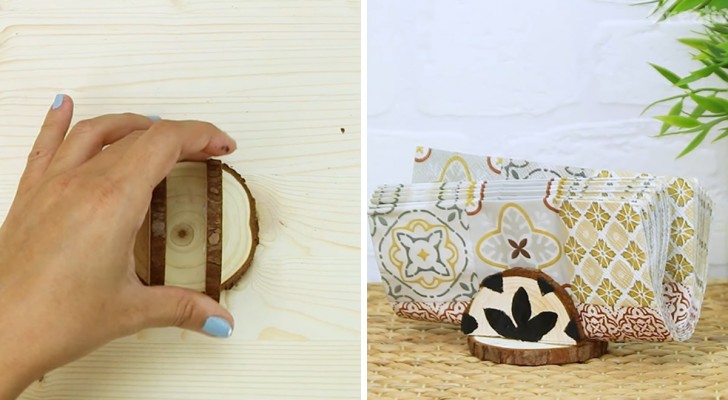
Even creating a very unique and functional napkin holder is quite simple. Cut one disk in half with a hacksaw to get two halves which are identical in size. Secure these to another disk which will act as a base. Ensure the two halves are parallel to each other and there is a gap sufficiently large for your napkins. Then decorate the object with stencils, acrylic paints and PVA glue.
4. Little pictures
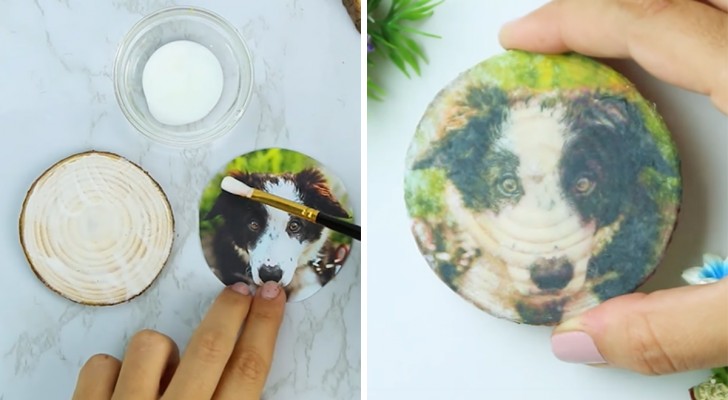
And wooden disks can be used as photo display objects. Print out the photo you want to display on the disk and cut it to the same size as the disk itself, with the subject in the center. Glue both on the surface of the disk and the photo itself and glue the photo to the disk with the image face down on the disk. Let this dry and then, with a sponge soaked in water, wet the disk, soaking the photo. Then, using your finger, rub off the wettened photo paper. Almost like magic, the image in the photo will appear "printed onto" the disk.
For full details about these projects, check out the video below: