Plants framed on the wall: find out how to make paintings with succulents to decorate your walls!
Decorating a house with plants is a habit practiced by many, as well as being a real rule of interior design techniques. Plants, in fact, add a comforting and relaxing element that is inimitable in any environment - they soften it, make it more homely and, in fact, bring a bit of nature into our homes. Taking care of their growth is also therapeutic and fascinating, and it then becomes interesting to find out the many ways to combine the desire to furnish using them and with taste in our homes.
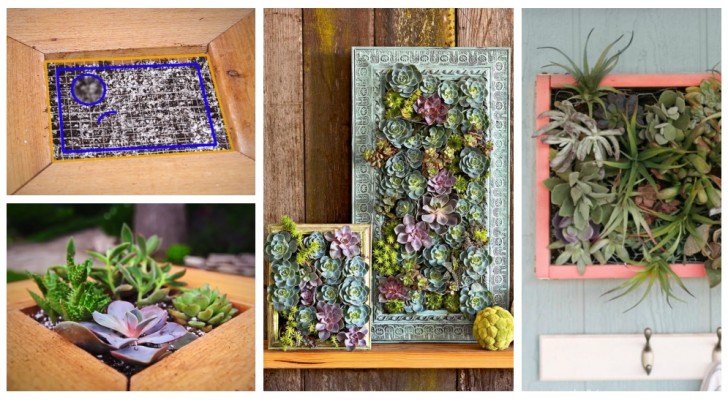
An increasingly popular idea is to create vertical gardens, using the walls of the house to hang up planters of all kinds, and among the most original DIY projects there are are certainly those using succulents as a sort of living picture - which can be easily done using DIY projects.
Video Tutorial via Lowe's Home Improvement/YouTube
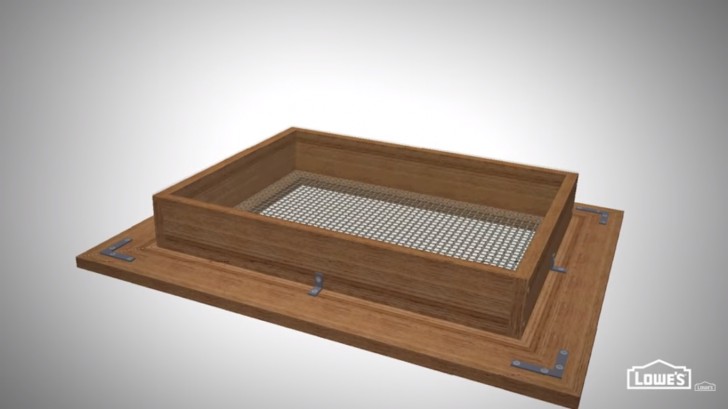
In all the succulent painting models that we describe here, you will need a few pieces of wood to create the frame that will act as both the picture frame and the planter / pot (therefore also all the necessary joints and screws or nails will be needed) and also a tightly meshed metal net that you will use on both on the bottom of your painting and on the surface in front of it. Then you will need scissors to cut the mesh and a soil suitable for succulent plants: you can buy this or prepare it by mixing as follows:
- 2 parts of universal potting soil
- 1 part of perlite
- 1 part of sand
Video Tutorial via Lowe's Home Improvement/YouTube
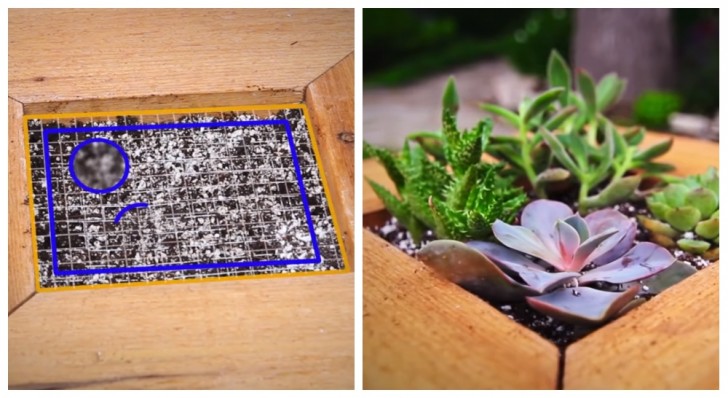
After building the frame, and fixing the second surface net, fill it with soil. It will be necessary to wet it every now and then to tamp down the earth and be able to insert more. When you have filled it amply, arrange the plants how you would like, but always taking into account that they will also grow - perhaps even doubling in size - so leave plenty of free space.
Once you have decided on the arrangement, cut out the net just enough to place each plant, and without touching the outermost edge of the net. Arrange the soil, water and the painting is ready.
You can follow the steps of the video tutorial by clicking here.
It's even easier to fit old bezels, which will only need to be the correct degree of thickness / height and a mesh bottom on the back.
Once the plants grow and fill the available space, they become a beautiful mosaic painting of shapes and colors.
Obviously, sufficiently lit walls should be chosen and in places where temperature and humidity are suitable for the cultivation of the selected plants.
Every time you need to water, you will have to remove the picture from the wall and place it flat, putting it back on the wall only when the water has drained properly.
These plant paintings are perfect for decorating any space in the house with originality.
Would you like to build one?