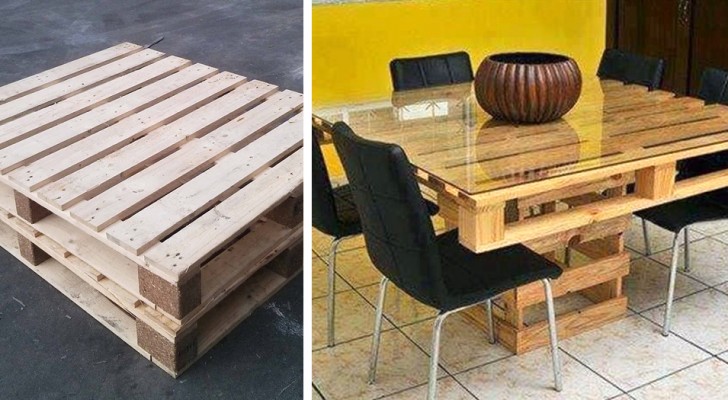
Making a garden table with pallets: a simple and very economical project
There is a reason why do-it-yourself jobs with pallets are always successful: dock levellers are in fact an extremely versatile and robust material, which can be transformed into a myriad of different projects. There are really a lot of furniture that can be built from a pallet, and many of them are quite simple, so much so that they are the ideal projects for those who want to get a little familiar with do-it-yourself.
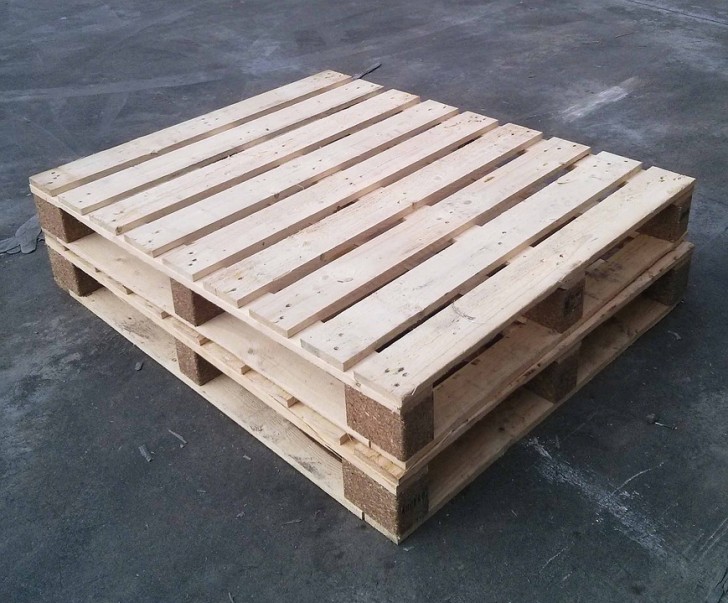
Among the most common ideas, there is that of using pallets to build a table, as in the tutorial that we report below. The important thing is to start with pallets that are still quite intact, so when you have to choose your pallets, whether they are discovered in some forgotten corner of a street or obtained from some shop or shop, make sure that the various parts are firmly to a few nails or extra screws to tighten boards and various pieces well. Otherwise, you can look for retailers, even online, of new pallets: now there are many sites where you can buy them, even those of famous DIY and do-it-yourself brands sell them in different sizes.
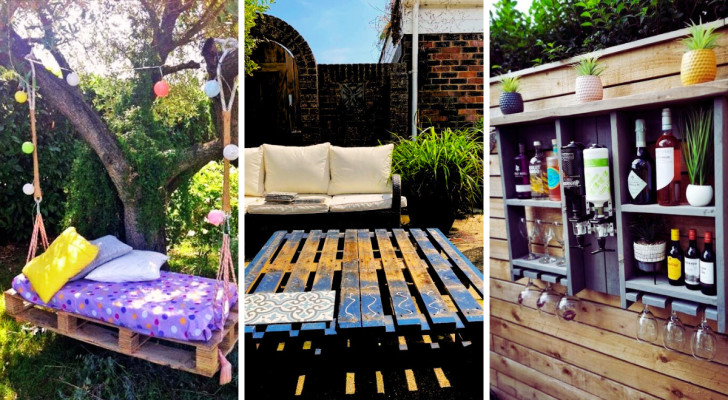
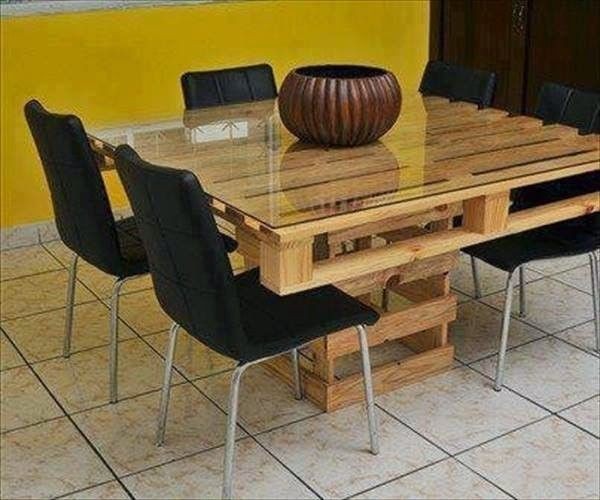
The table that you can make with this tutorial is perfect for outdoors: a solid wood structure, with a shelf to cover - if perhaps you keep it under a gazebo, pergola or porch - with a glass plate. The wood of the pallets is treated with impregnating agents that give it a natural finish, but of course you could paint it in the color you prefer.
What you need for this garden table:
Two square pallets, smaller in size to be used as the supporting structure of the table, that is the legs.
A larger, square pallet to use as a shelf.
A base varnish, one of those to treat wood and cure it. They are impregnating agents that are used to prevent the wood from being attacked by harmful agents such as fungi or woodworms, and penetrate the fibers, nourishing them and better prepare the surface for the application of the coloring varnish.
A colorless or colored varnish: here you will choose those that enhance the natural color of the wood, or that dye it by imitating natural essences, or even that have different colors. The finishes can be polished or waxed, and serve to seal and make the surface water-repellent. If you start from pallets that have different colors, it is always advisable to choose products that color and uniform the wood. However, there are also products that are two in one, or impregnating agents that color and treat the wood so as to make it impervious to fungi, woodworms and atmospheric agents. Or you can use a combination of varnish to nourish and color (wood effect or colored) and then a finishing product (glossy or satin / waxed) to make sure that the color does not change with exposure to the sun, and that wind and rain does not damage the wood. In any case, it is essential to choose all water-based or all solvent-based products, or that are to be lengthened with one or the other substance.
- Abrasive sandpaper with different granulometry, to be passed by hand or with a sander.
- A hacksaw (better if you have electric saws).
- A brush (flat and wide, i.e. a flat brush).
- A great file.
- Nails and a hammer.
- Gloves.
The procedure
If the two small pallets to be used for the table legs are not exactly the same size, calculate the height and width of the smaller one well and eliminate the unnecessary part of the other so that it becomes the same. Help yourself with measuring tape and pencil and then work with the hacksaw. Always remember to use wood gloves, at least until you have sanded the surfaces well.
At this point you can also fix any broken tables, to fix or replace.
Sand the wood
It is a bit long and tiring operation, but it is essential for the success of the whole project, so consider dedicating all the necessary time to it. Eliminating any splinters and irregularities not only makes the surface smoother and more pleasant to the touch (thus avoiding injuries when working with wood or when using the furniture), but it is vital to ensure that when it is time to apply the paint it has a homogeneous and smooth appearance.
Start with coarser grit sandpaper, you can work by hand, fixing it to specific supports that have comfortable handles, or better still use sanders. However, there will be gaps and parts that are more difficult to reach with the various tools that will be sanded by hand, or for which you can help yourself with a wood file. At this stage you can also decide to round off the sharp corners, shaping each part of the pallets as you prefer.
When you are sure that you have sanded everything, remove the accumulated wood dust: the surface must be very clean before moving on to varnishes. Blow, brush with a clean and dry brush, maybe even help yourself with a hairdryer.
With nails and a hammer, join the smaller pallets together, keeping them spaced but with brackets of 20-30 cm. (simple wooden tablets) in order to widen the support base: you have to build a pedestal, then arrange them vertically. You can decide whether to face the backs towards the center (perhaps the most convenient option for fixing them together), or whether to face them with the back facing outwards (which instead is a method that makes the base wider and more stable). Be very scrupulous in taking the measurements, so that the table legs are well leveled, and when you have found the right position you can help yourself to hold it with clamps while you nail the parts together with the hammer, so that you can also work more comfortably in Horizon.
Mount the widest pallet as a shelf, perpendicular to the pedestal. Again, find the perfect centre of gravity, so that the table is not unbalanced on one side or the other.
In the event that the table seems wobbly, you can use some extra wooden slats or strips, perhaps made from another pallet, or old skirting boards: they will be nailed to the junction points, to reinforce the structure and eliminate any form of play. between the various parts.
When your furniture has taken shape, finally move on to paint. Depending on the step (base plus paint and finish, or those with two-in-one products), you will have to respect all drying times between one coat and the next.
Generally, three coats of colouring varnish are required, and each one must be applied in the direction of the fiber. When working with wood, the option of a colorless first coat is preferred in any case, in order to prepare the surface homogeneously and avoid spots due to the different degree of absorption of the wood.
The second coat, which can also be coloured, should be applied after 24 hours, and after another quarter of an hour, you can lightly wipe with a dry brush, or a pad to make the surface more uniform. This is not an essential precaution, but if you want to try it, it is better to try first on an inconspicuous spot, in order to make sure you do not damage the paint with streaks or unsightly marks.
The third coat, which can be colorless or colored, must be applied after 24 hours and, shortly after (10-15 minutes), go over with a dry brush or a pad to make the surface more uniform. If you want, you can also give a fourth coat of color, and if it is a product that already has the protective finish incorporated, you can apply this last coat after 4 weeks, always having perfectly cleaned the wood before. These times are suitable for those who want to do the job very calmly and with every care, but you can also follow the instructions on the product packaging to know how much time to pass between one coat and the other.
When the structure is assembled and painted properly, the time comes to enrich it with any detail you want: if the slats of the support shelf are very spaced (depending on the pallet models), you can fix a glass plate on top, or plexiglass if you want a slightly less fragile material. Working with glass requires a little experience for cutting and grinding, so it is better to rely on expert hands. To fix this type of shelf you can use suitable rubber pads, or double-sided tape suitable for glass surfaces.
A piece of furniture with a glass top must still be placed in a sheltered place, to avoid being damaged by some object that could fall on it.
If you don't want to use glass, you can also decide to cover everything with a wooden shelf (plywood, recycled wood). Again, you could possibly insert a shelf lower, with plastic or metal.
It is a very simple and inexpensive structure to make, perfect for those taking their first steps in the world of DIY, and it could then be combined with seats or outdoor chairs with simple shapes, always made from pallets. In addition, especially in the case of a piece of furniture finished with a glass plate, it could also be used at home, if the interior design is suitable for hosting rustic elements.
Would you like to try your hand at building a table made of pallets like this one?