How to grow tasty tomatoes at home and always have your personal supply
Tomatoes are among the most loved vegetables, which really cannot be missing in any vegetable garden, not even in those obtained on balconies and terraces. In fact, this plant is also suitable for growing in pots, and with due care it produces many delicious fruits during the summer.
They are plants native to Peru, cultivated by the Maya and Aztecs and then arrived in Europe and from there spread to many parts of the world. Nowadays, therefore, there are infinite varieties of tomatoes, each with different shapes, colours and above all different tastes, to be used in a myriad of different recipes. It is very likely, therefore, that each of us has a favorite strain so why not try growing it at home? Below we present a series of useful indications for successfully growing your tomato plants.
Ground
Tomatoes need a slightly acidic soil (pH = 6) but above all loose and well draining, as the stagnation of water is absolutely deleterious for the plant and can easily cause diseases from which it is difficult for it to recover. The substrate must then be rich in nutrients and organic substances: to grow large and tasty, tomatoes "eat" a lot.
For this, it is essential to prepare the soil well even before starting to cultivate. Till the soil of the whole plot (or pot) in which we are going to plant the young tomatoes thoroughly: aerate it by hoeing vigorously and add nutrients and organic substances. For example, mature manure is fine (2.5 kg per square meter is needed), or compost.
Exposure and climate
If the corner of the garden or the balcony to be dedicated to the vegetable garden is not beaten by the sun, it is better to avoid the cultivation of tomatoes: although they resist quite cold (but not frosts) and therefore can do quite well in a rather wide range latitudes and altitudes, they need to be exposed directly to the sun's rays for several hours a day.
To germinate, they will need at least 15/20 degrees, and will not be able to withstand cold peaks that drop below 5 degrees: at that temperature they stop growth, and if the cold continues there is a risk of losing the plant.
Planting
For those who grow in pots, plants that have produced a sufficiently developed root system can be moved into the pot, while to pass them in the ground one usually waits for the pre-flowering moment, when the plant is about 30 cm tall. The important thing is that, at the time of transplantation, the minimum temperatures are at least 10 degrees, preferably a few more. The flowers can only attach if the temperatures are above 13 degrees, otherwise you will see them fall, which will result in a lack of fruit.
If you plant when the flowers are about to bloom, you can position them in such a way as to direct the inflorescences towards the outside of the rows, so as to better expose them to the sun and be able to collect them more easily. Generally, it is advisable to leave a minimum of 50 cm and a maximum of one meter between the holes, so you can pass between the plants, harvest, prune and water easily. In very hot areas, however, the distance can also be reduced to a range between 25-50 cm, so that once adult the plants will shade each other during the hottest hours.
Then, take a good look at the size of the stick of soil in the pot that contains your tomato plant and dig a hole just deeper. If you want, pour a little fertilizer on the bottom of the hole.
At this point, remove the first leaves closest to the collar, the lower ones, so you will avoid burying them and risking that rotting will compromise your work. Carefully remove the plant from the pot or container: if they are soft plastic containers, gently press with one hand from the bottom, while with the other hand gently squeezed around the collar, pull the plant away. If, on the other hand, the plant is a little larger, in a pot, then place a hand resting on the ground, with the spindle touching the hollow between thumb and forefinger, turn the pot upside down while still holding the plant and pull the container away. You must always try to extract the plant with all the stick of earth around the roots.
Put the plant in the hole, also burying part of the stem freed from the leaves, then cover everything with soil, compacting it around the base and wet with a little water to promote compaction and immediately nourish the plant itself.
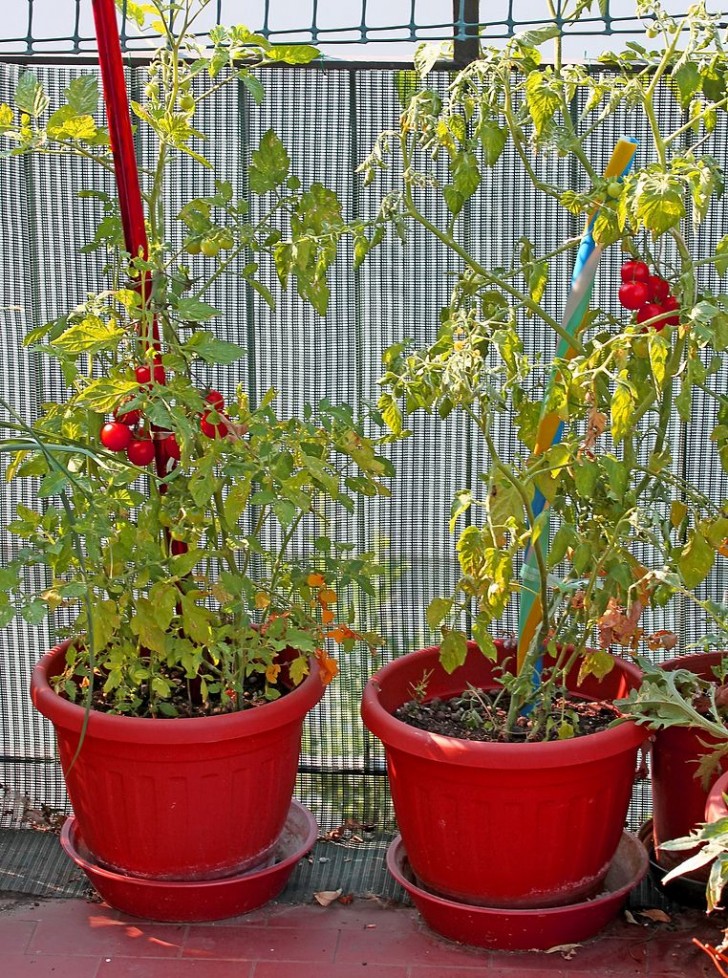
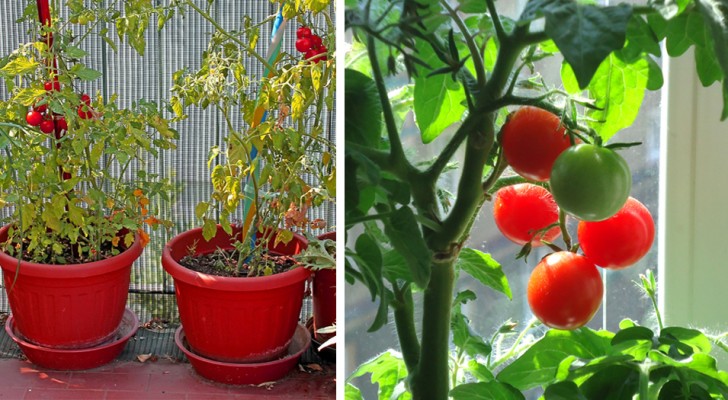
The supports
For sure you have seen that tomatoes in vegetable gardens grow on supports: they are plants that in fact produce long flexible branches, which tend to lean on the ground and risk breaking under the weight of the fruit. There are many types of structures to make them grow, even ready-made, but if you do not find any you can safely use canes or sticks: on the net you will find many techniques to plant them and tie them together, creating like tall and narrow Indian huts but also many other types of scaffolding. Everyone has a favorite technique, but the important thing is to space out each pole enough so that the plant, growing and thickening, is always fully exposed to the sun.
The height of the poles (or cages) must be about 120 cm, and they must be driven deep into the ground (30-60 cm) next to the stem of each plant. Every four or five days remember to check the plants in the growth phase: you will have to gradually tie the stems to the poles (without tightening too much), otherwise they will stiffen as they grow in directions that you can no longer correct.
Also remember that periodically pruning must be carried out (also called “sfemminellatura”). This consists in manually eliminating the shoots that develop in the "axilla" of the leaves, that is, at the junction between the stem and the lateral branches (see below).
Pruning
An important procedure is that of removing the so-called "axillary buds", which you may have heard commonly called "cacchi" or "sissies". They grow in the armpit of the leaves, and must be eliminated immediately, even with the nails, so as to prevent the plant from wasting energy in their growth. If you want, you can leave them on the ground, where they will eventually enrich the soil. Often, then, from the base of the plant other shoots sprout, called suckers: these too must be eliminated or, as for the larger axillary shoots, you can replant them in pots, treating them like any cutting and from these you could have late tomatoes.
In September then the topping is carried out, that is the cutting of the central apical shoot, so that the plant does not yet grow in height but strengthens the other parts.
Irrigation
Plant irrigation depends very much on the soil and the temperatures in the area. It is certainly necessary to dissolve the fertilizer well after having administered it so that it reaches the roots, and since these plants are exposed to the sun but still fear excessive dryness, they should not be left dry for too long. So basically, you need to make sure to wet as soon as the soil begins to dry, but never excessively, that is, causing water stagnation (the water must therefore be absorbed within a few minutes of irrigation, otherwise you will have exaggerated).
When it is very hot, and usually after the flowers come out, it is recommended to water twice a day, ideally in the early morning and in the evening after sunset. Always avoiding stagnation. Remember not to throw the water directly on the leaves and fruits, but direct the jet to the base of the plant.
To help keep the soil moist, and also avoid the growth of weeds that steal nutrients from tomatoes, mulch with straw or dry grass.
Fertilization after planting
After a few weeks from planting, if you want you can continue to enrich the soil once every 7 or 10 days (never less, but it's fine even more rarely) with natural fertilizers rich in organic material. Water-soluble organic products such as ox blood or borlande (ie the residues of beet processing) are very suitable.
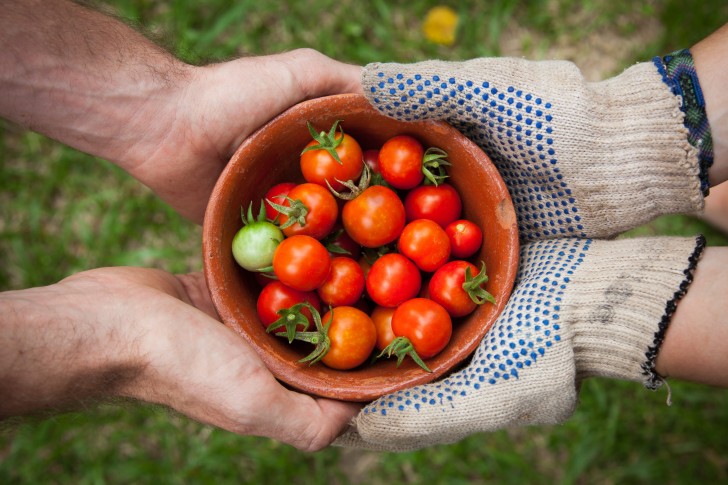
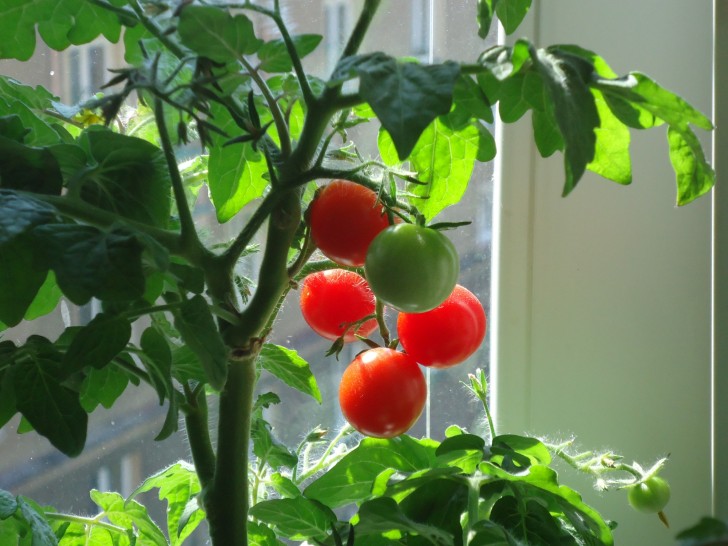
Harvesting of tomatoes
Typically, tomatoes are ready for harvest 60-80 days after planting. If we want to use them to prepare tomato preserves we have to wait until each fruit is fully ripe, so it must have a saturated red color. Tomatoes destined for the table, on the other hand, can also be picked a little earlier, when some part of the fruit is still green-pink.
Diseases of tomatoes
If a plant is affected by a fungus, it must be uprooted and burned or otherwise thrown in the garbage, to prevent it from infecting the others as well. So don't leave it on the ground or in the compost pile, where the fungi could easily spread to other specimens.
A typical disease of tomatoes (and potatoes) is downy mildew, but just as often it happens that they are affected by fusarium: the spores of these fungal diseases can remain in the soil for a long time, and also ruin the crops of the following years. Downy mildew generally occurs from mid-August, first with a yellowing of the leaves, which subsequently turn brown, while spots in concentric circles form on the fruits. It can be treated with copper-based products.
Fusarium, on the other hand, is more dangerous, and leads to the quick death of the plant. When this begins to lose vigor, check the stems: if you notice that the capillaries are dark, it means that it is infected and must be eradicated to protect the others.
Follow these directions and you can enjoy tasty tomatoes grown by yourself!