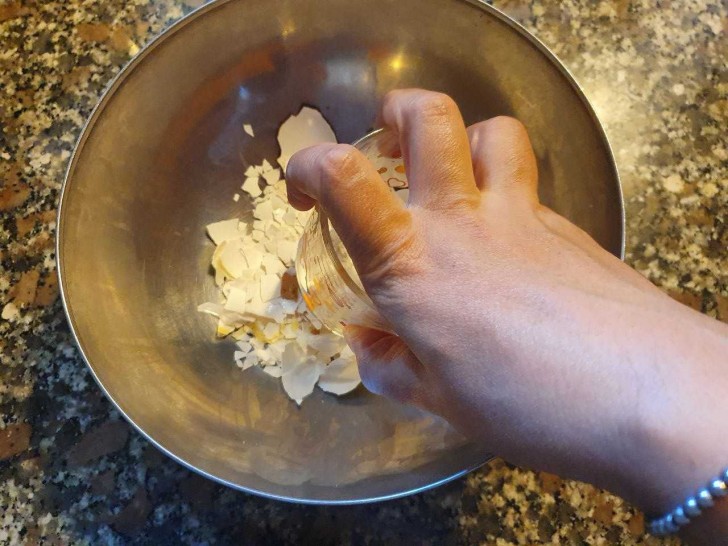
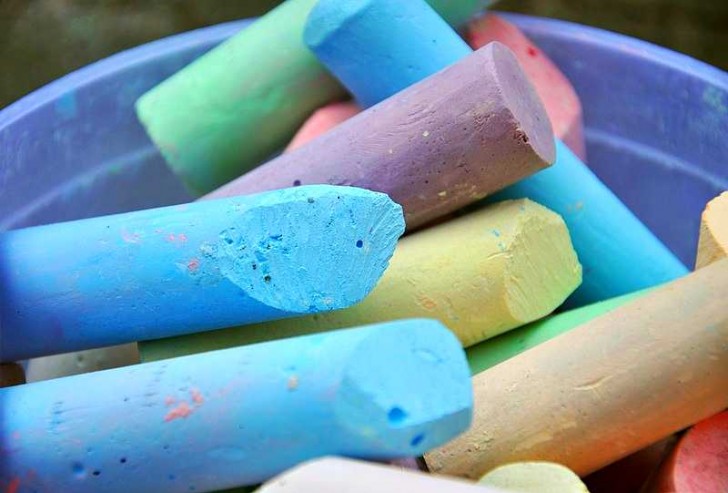
DIY colored chalk: You can make it at home using egg shells and flour
Playing with colored chalk, drawing pictures on the driveway, or decorating a blackboard - perhaps even on a wall painted with blackboard paint - is a timeless pastime, which wows the little ones and entertains adults as well.
It is easy to find colored chalk in many shops, but it is also super interesting and fun to make them with your own hands, following simple steps that can also be done with the help of the children, (who will also learn something valuable). And to make the chalk you just need, the ingredients are easily found in the kitchen - like egg shells and flour. Read on to find out how to make colored chalk:
Creativo
What you will need:
- The shells of 5 eggs
- Flour (00 wheat flour is fine, but also any finely ground type will do)
- Food coloring
- Hot water
- A bowl for mixing
- Wooden ladles
- Absorbent kitchen towel
How to proceed:
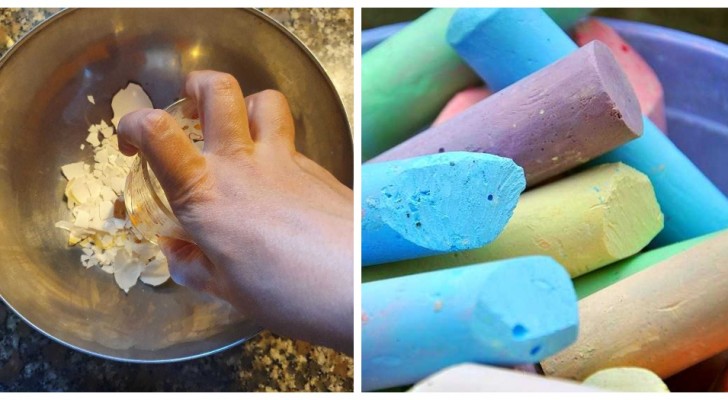
- Rinse the eggs shells thoroughly to remove yolk or albumen residue.
- Remove the thin, white membrane inside the shells as well.
- Let them dry out thoroughly.
- Grind the shells as finely as you can. There are at least a couple of ways you can do this: by using a glass or other object to mash the shells in a bowl (but it will take some patience), or by having them whizzed up by a kitchen blender (some use the coffee grinder!). If you have pestle and mortar, it will be more fun for the kids.
- At this point, you have all the ingredients ready: for each piece of chalk you will need a teaspoon of flour, one of hot water, one of pulverized shells and a few drops of food coloring.
- Start by mixing the water and flour together, creating a paste, and then add the shells; mix again and finally, add the food dye.
- When the paste is homogeneous, form a chalk stick with your hands. Make it long and with a diameter which is more or less the same for the entire length. If necessary, help along the shaping process by adding small amounts of water.
- Now you have to dry the paste sticks: you can alternately wrap each stick in absorbent paper and let it dry for at least 3 days, (up to a maximum of 5-7 days). The paste is ready when it does not crumble to the touch.
- If you want the chalk quicker, you can put the paste sticks on a baking tray lined with parchment paper and place in an oven at 60°C (140°F) for an hour and a half. After that, let it air dry for an entire day.
Your chalk is now ready to use!
A word of warning: the sticks may be harder than regular chalk, so be careful before using them on blackboards and walls. Test them first on a small surface to see if they leave any scratches. They will still be perfect for drawing on concrete and asphalt / tar surfaces!