Do you want to propagate your Sansevieria? You can do this easily in 3 different ways
Among the most popular plants in homes all over the world is definitely the Sansevieria. In reality, this name is used to describe several varieties, one of which is particularly popular - the one with yellow edges, which is called S. Trifasciata.
The reason for their success lies in two main factors: 1) they are plants with a very particular shape, made of thick and leathery leaves, green with darker and very prominent veins (common names for this plant are also "mother-in-law's tongue" and "snake plant", "devil's tongue plant"); and 2) above all, they are very easy plants to cultivate, since they require very little water - to the point of one being able to almost forget it for long periods in winter. And in terms of temperatures and exposure, they are able to survive in areas that get little direct sunlight.
Another useful feature of these plants is that from one, you can easily propagate others, and to do this you can choose between one of three ways, that we outline below.
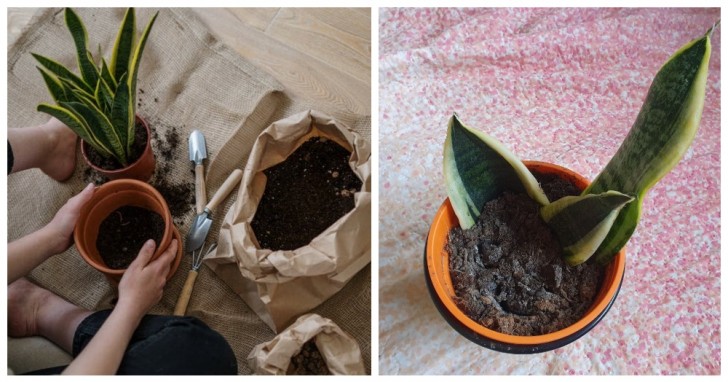
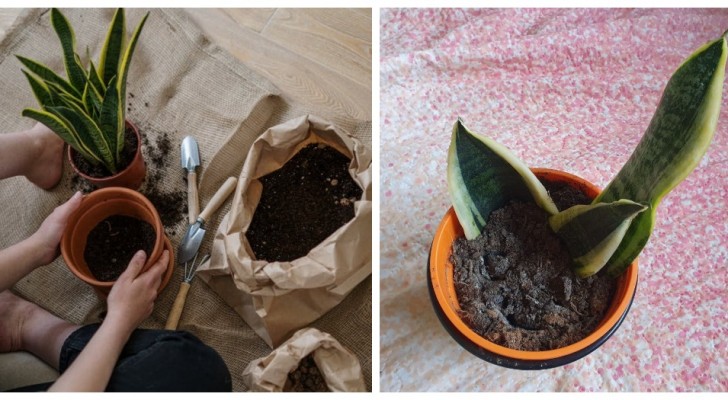
First method: By dividing up the root ball
When the plant is very large, the recommended method to propagate it is to divide up root ball, taking with it the relative portion of the plant which is attached above the divided root sections.
- Remove the plant from the pot.
- Use a sharp knife or garden shears with sterilized blades and cut off a portion of the roots, separating it from the rest of the root bundle.
- With your hands, seperate this part from the rest, bringing with it the leaves that are growing immediately above it (you should try to get at least 3 leaves).
- Plant the portion thus obtained in a separate jar, in which you will have put a little expanded clay and then a porous and well-draining soil.
- Water immediately and then continue to care for the plant as you always did for the mother.
Second method: By placing leaf cuttings in soil
- Take a leaf from the plant, and cut it off at the base with a knife or shears which have sharp and sterilized blades (sterilize using alcohol or a flame).
- Divide the leaf into several sections that are at least 5 centimeters long. It is essential to remember the direction of the leaf: that is, remembering which side of the segment you have obtained was facing the base and which was facing towards the top. For example, you can put a "v" cut on the side which points to the base.
- Dip the cuttings in a little powdered rooting hormone (you can buy this product online) and insert it directly into suitable soil, so that the leaf is buried for up to one or two centimeters deep.
- Keep the pot with the cuttings in a sunny spot and keep the soil slightly moist but never too wet. Make sure that the cutting are always in the soil.
Third method: By placing leaf cuttings in water
- Thoroughly sterilize a knife or scissors and cut the leaf as in the previous case.
- Also wash and sterilize a glass container where you will root the cuttings - you can also use a little hydrogen peroxide. The important thing is that you rinse and dry the container well before using it.
- It is best to cut the leaves immediately after watering the plant. In this way, the cut on it will have time to "heal" before risking coming into contact with more water later.
- Put the cuttings into the glass / jar that you will have filled up to one third or half with water.
- It is vital to remember to change the water every two days.
- Each cutting should produce roots from the cut within two weeks, and after two months the roots will have developed sufficiently to be planted into the ground. A small plant may already have sprouted directly from the base of the cuttings.
Great job!