Improved hygiene in the bathroom: how to thoroughly clean the bathroom fan effortlessly
With summer just around the corner, you also might start to think about doing a classic spring-cleaning to "refresh" your home. Often, one of the most difficult and dreaded tasks is cleaning the bathroom ventilator/extractor fan. However, by following the right methods, it is possible to do this chore quickly and effortlessly.
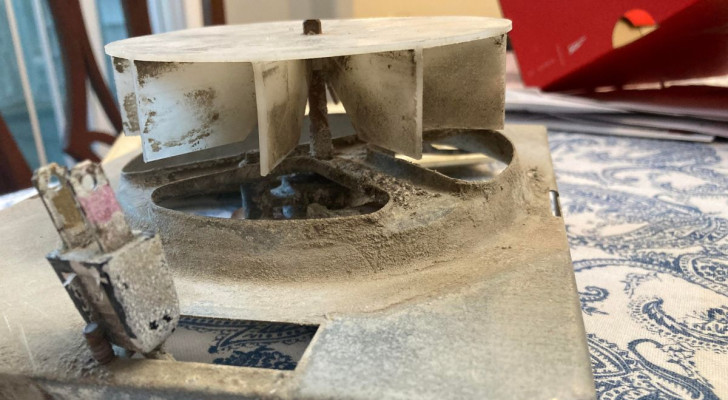
How to disassemble the bathroom fan to start the cleaning?

Before you begin cleaning your bathroom fan, make sure you have turned off the appliance and unplugged it for your safety.
We also recommend that you wear an apron/overalls and cover your head with a cloth or shower cap so you don't get covered in dust.
Start by disassembling the fan. This process may vary depending on the model you have installed in your home: you may simply have to pull off the cover, press some release mechanism, or even have to unscrew an access plate/cover.
Once done, try to pull out as many components as possible (such as the fan propellers, for example) in order to clean the unit thoroughly.
How to clean the bathroom fan easily
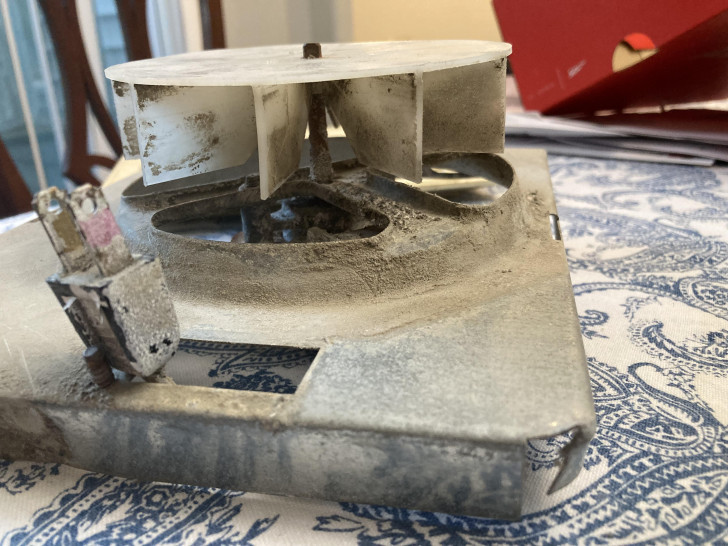
Once you have taken off the fan's coverand removed all the components possible, you can start the actual cleaning process: remove excess dust using a cloth and a soft-bristled brush or use a vacuum cleaner.
Using a liquid detergent immediately would create a mucky "sludge" from the dirt, making this cleaning chore much longer and more difficult.
To ensure your fan cover is cleaned thoroughly, start by soaking it in a basin filled with warm water and a dash of dishwashing liquid.
Leave this to soak for a while to soften any dirt and other residue. After soaking, rinse off thoroughly.
If any stubborn dirt remains, use a soft-bristled brush or a sponge to remove these (and without scratching the surface).
Next, it's important to focus on cleaning the fan blades, the housing, and all other components you have removed. To do this, use a damp cloth, making sure to carefully pass it over each part in order to remove any remaining dust and dirt.
Once each component has been cleaned, allow all the pieces dry out thoroughly before reassembling the fan. This step is crucial to avoid the formation of mold or rust which could compromise the performance of the fan in the future.
This cleaning chore shouldn't be seen as being a difficult task or one that should be "put off" indefinitely. By following the this advice, you can make doing this spring-cleaning a piece of cake!