Not sure what to do with the pine needle carpet in your garden? You can weave baskets out of them
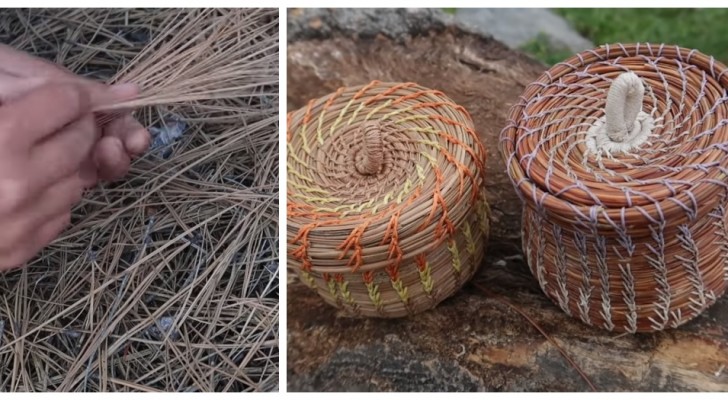
Anyone who has a pine tree in the garden or lives near some park where these trees grow, will have noticed the enormous amount of needles that constantly cover the ground below them: it can be a real carpet at certain times of the year. These pine needles can, however, become truly fascinating art objects! In fact, it is possible to weave them together and create baskets, bowls and more with a little thread to keep them all together.
The process takes some time but, just like in the native North American native populations (and also in India, Africa and Central America), it is a technique that allows you to create truly beautiful arts and crafts. Here, you can view a tutorial from the Wild She Goes account on YouTube.
Video tutorial via Wild She Goes/YouTube
What you will need:
- Plenty of pine needles (in the tutorial they used a pound [about 500g] for a small basket).
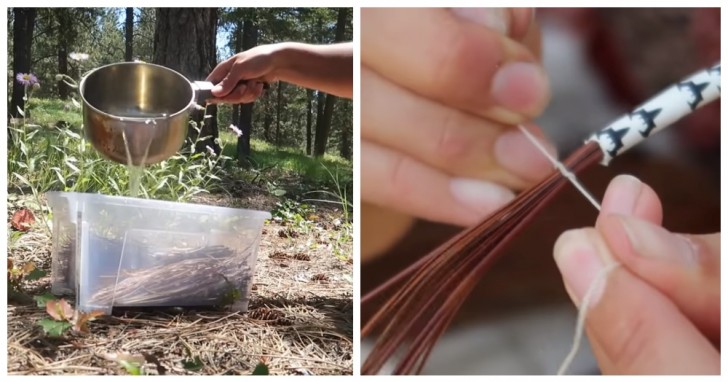
- Water
- Strong thread in your favorite color. You can use those types that are coated with wax and that are also used for DIY jewelry. In any case it must be thick and robust.
- Scissors.
- Curved tip tweezers.
- Large sewing needles (such as those for used for leather or wool - in any case, they should have wide eyes).
- Paper straws (or even metal tubes): these are used to create bundles of pine trees that will always be the same thickness.
The longer they are, the easier the pine needles are to work with. A length of at least 12 cm is recommended. It is also necessary to discard all those that have any imperfections, black spots or that are in any way damaged: it is easier to do this by collecting those that are closer to the surface and have not yet been covered by another layer of needles; or collect those dry ones that have remained attached to some dead branch. The important thing is that they are thorougly dry, and if they are not completely desiccated, you can dry them out in the sun for a few days, away from humidity.
Then you need to soften the needles: boil enough water to immerse them, and let them soak for 30 minutes. If you do not use them immediately, once they have cooled down, you can keep them in the freezer for a few days and then store them in a box in a dark, dry place for a few months.
At this point they will be very flexible, and while you work, keep them in a damp towel or tea towel nearby so they don't dry out again.
- Remove the petiole (the petiole is a stalk that connects the needles to their base) to completely clean the needles and without separating the pairs, Then insert them into the straw until it is full, but do not overfill: the straw must be able to slide over the bundle of needles.
- Make a knot under the straw and about 8 cm from the tip of the needles (where they had the stalk), and then cover with the thread going towards that end.
- When you have covered about 6 cm of needles, hold the lining with the thread and fold it in half: a sort of loop will be formed.
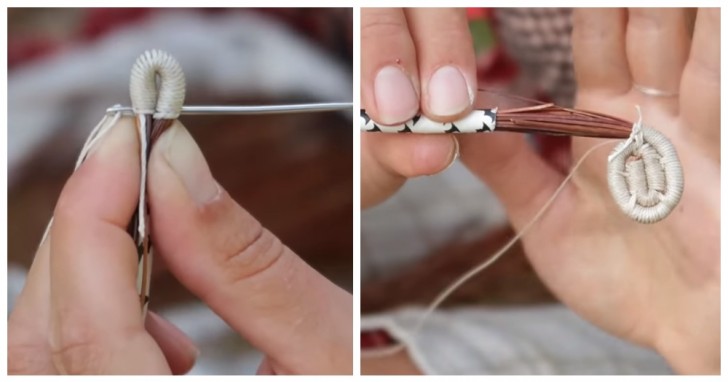
Video tutorial via Wild She Goes/YouTube
- Thread the sewing needle and pass it from one side of the loop to the other, several times until the two sides are joined securely.
- Cut off the excess needles (from the petiole side).
- Continue to wind the thread onto the bundle of needles: make 10 turns, then sew the new piece on the one that is already rolled up, and continue like this until you have about another 10 cm of bundle covered with thread, which will gradually form a sort of a wheel.
- As you go, keep filling the straw with new needles as needed, always threading them all in the same direction and in the center of the bundle so they don't stick out.
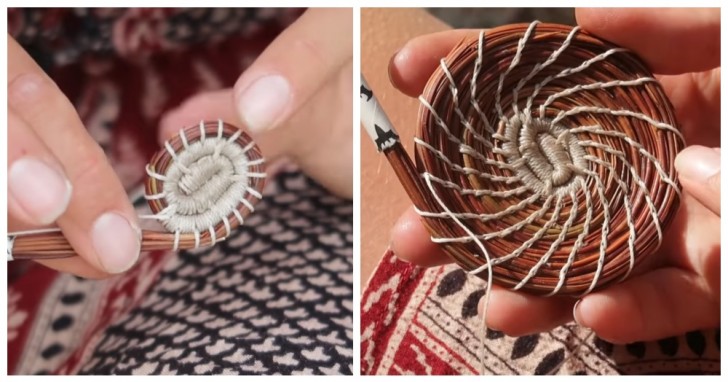
Video tutorial via Wild She Goes/YouTube
- At this point you can simply begin to sew the various circles with larger stitches: a simple stitch may suffice, but you can also make the tip of the sewing needle stick out in the middle of the thread on the previous round (slip stitch).
- Continue to create the bottom of the basket until the desired diameter is obtained.

Video tutorial via Wild She Goes/YouTube
- When you want to start working upward and creating the walls of the basket, lift the bundle of needles a little instead of continuing to keep going flat, and sew with a "V" stitch - that is, sewing first vertically and then creating an oblique stitch.
- When you have reached the desired height close off the end so that it is perfectly flat.
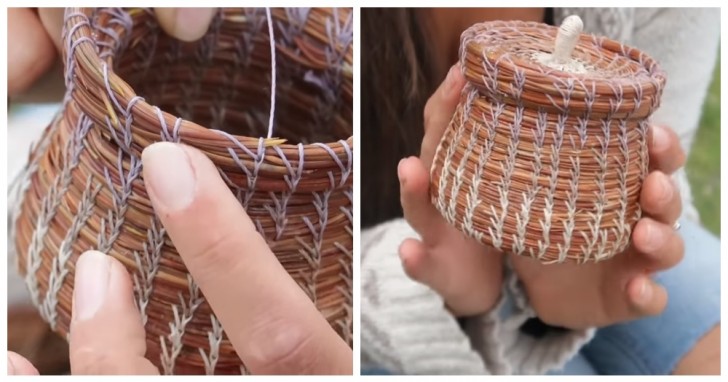
Video tutorial via Wild She Goes/YouTube
- At that point you can create the lid, even adding a knob (made with a bundle of needles folded and wrapped in thread, like you did at the beginning of the tutorial).
You can make baskets in various shapes - flared or straight, and even the lids can be changed a bit!
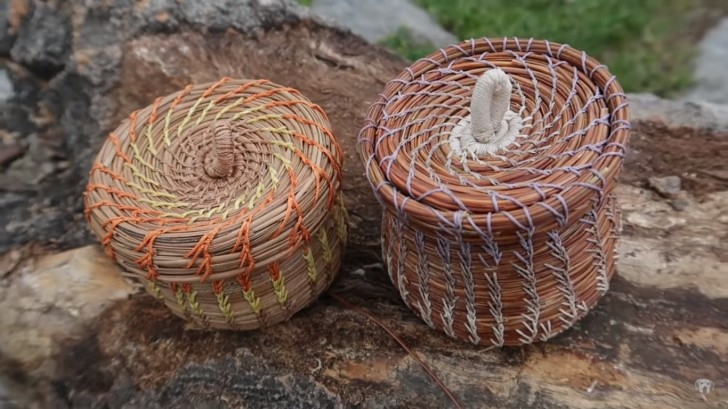
Video tutorial via Wild She Goes/YouTube
It's easier to watch the tutorial video than describing this process in words. Check out the video by clicking here.